

A couple of months ago I invited readers of my blog to join S.M.A.G. — Society of Mutual Appreciation and Gratitude and to paste the badge onto their blogs should they wish to do so. Well, invitation isn’t quite the correct word because membership of the group was not conferred in response to an invitation, but automatic through offering other bloggers support and encouragement through positive comments. I’m pleased to say there are a good number of S.M.A.G. members in the blogosphere regardless of whether or not the badge adorns their blog.
A week or two ago Jules Paige, who blogs at Jules in Flashy Fiction (and elsewhere), commented that she wasn’t sure how to go about adding the badge to her blog. I offered to send her instructions, and thought that maybe the information would be useful for others as well.
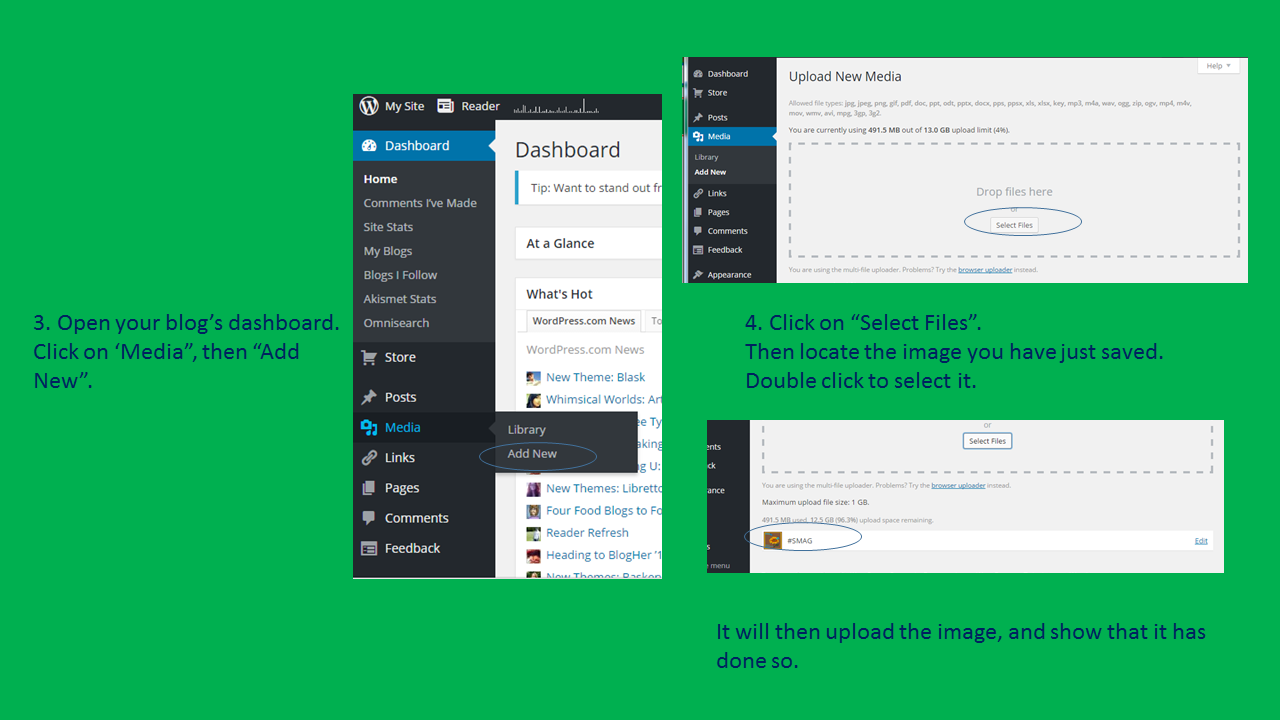
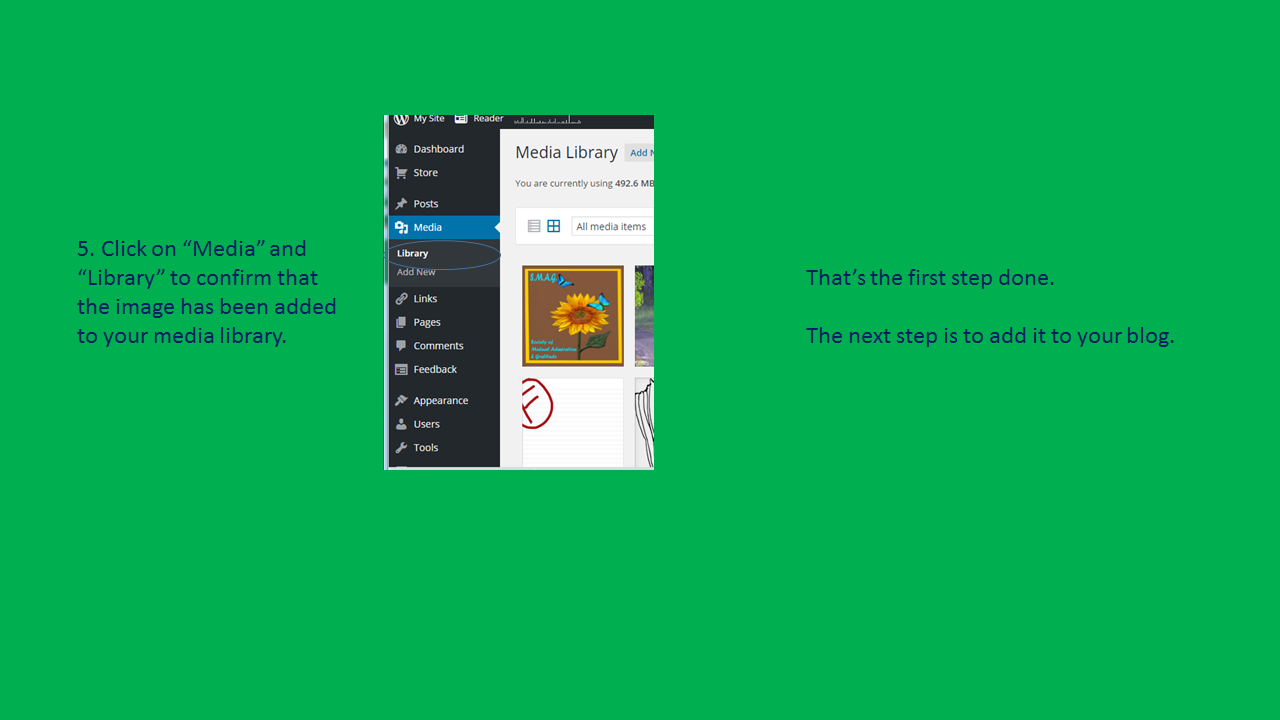
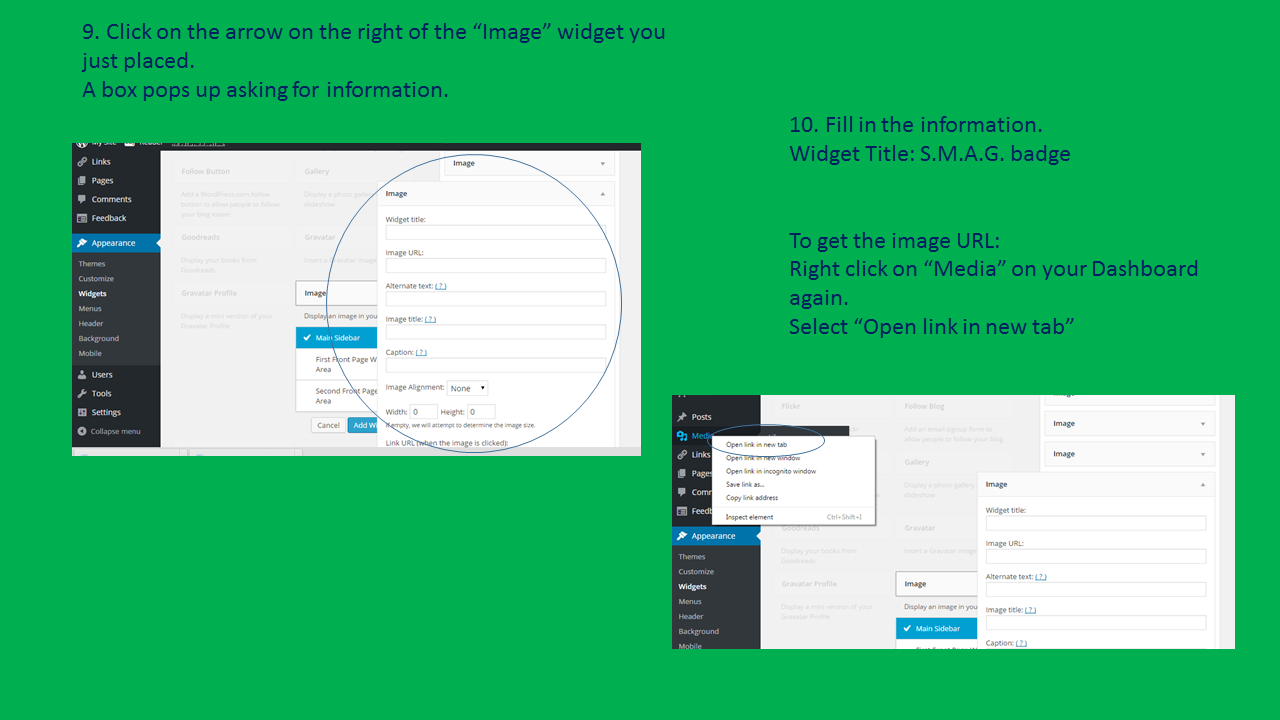
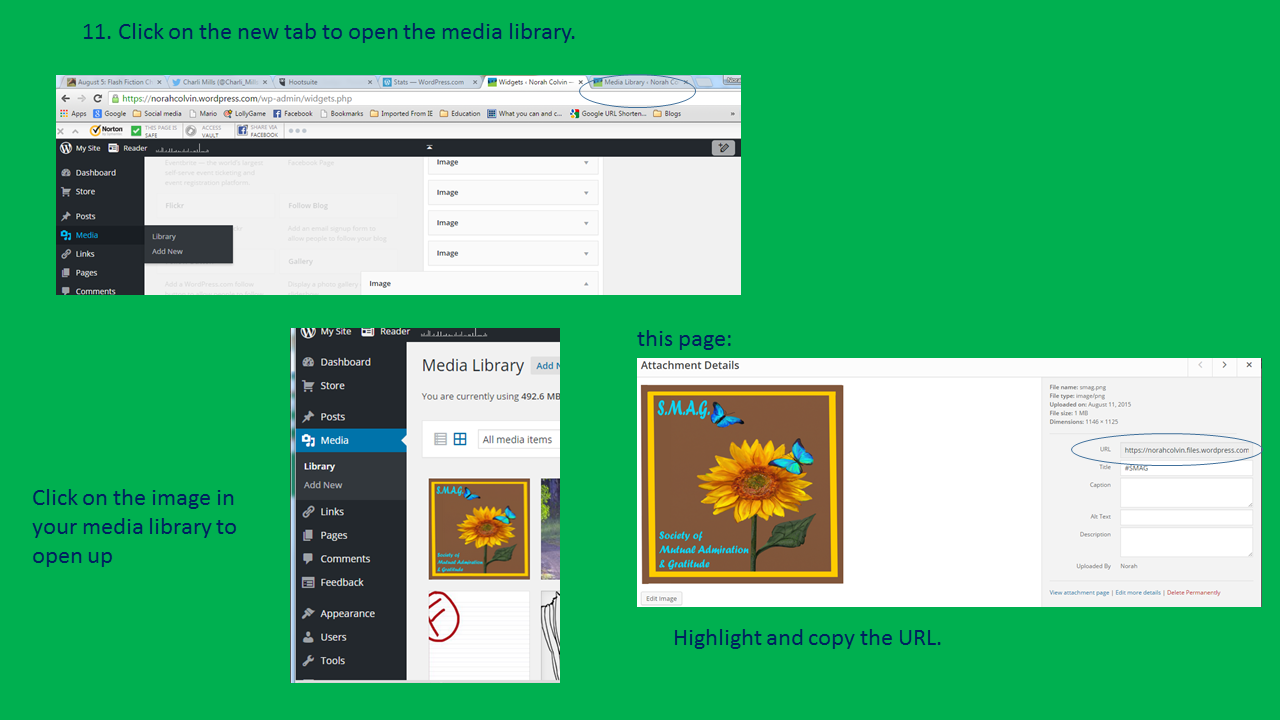
The following instructions are specific to the S.M.A.G. badge and WordPress blogs. A similar process would be used to add any image to a WordPress blog. However I am unsure how similar the process is for others. Please let me know if you find these instructions useful, or lacking in any way.

© Norah Colvin
© Norah Colvin
© Norah Colvin

© Norah Colvin
© Norah Colvin
© Norah Colvin

© Norah Colvin

© Norah Colvin

Thank you for reading. I appreciate your feedback. Please share your thoughts.

Pingback: That’s what friends are for | Norah Colvin
What a wonderful SMAG thing to post! 😀
LikeLiked by 1 person
Thanks Charli. 🙂
LikeLike
Great information, Norah.
LikeLiked by 1 person
Thanks Michelle. 🙂
LikeLiked by 1 person
SMAG is a lovely idea and your step-by-step for adding the badge is brilliant!
LikeLiked by 1 person
Thank you. Will I see it on your blog?
LikeLiked by 1 person
Yes, I think you will! Thank you! 🙂
LikeLiked by 1 person
… and it is done! 🙂
LikeLiked by 1 person
Lovely! Thank you for sharing. I’ll check it out next time I’m over – won’t be long – I’ve received a couple of emails about your recent posts. 🙂
LikeLike
Lovely! You’re welcome. 🙂
LikeLiked by 1 person
This is a fabulous, helpful post. Thanks for sharing. And I will share it, too. 🙂 You are wonderful!!! (SMAG)
LikeLiked by 1 person
Thanks for your SMAGness too, Sarah. 🙂
LikeLiked by 1 person
A very helpful resource, Nor! I am surprised by how (relatively) complicated the process is! Your instructions step through it well and make it nice and clear. Geoff’s point about resizing is really helpful, too.
LikeLiked by 1 person
Thanks Bec. I’m not sure that it’s overly complicated. I just cut it down to minute steps. Geoff’s point is good. I probably should have added that info and maybe will – as soon as I have (make) time! 🙂
LikeLike
I have updated the last slide to include size information. I hope it is useful. 🙂
LikeLike
Maybe I can just add a little to this most excellent post Norah! I was adding a picture of the cover of my new book the other day and it was wrongly sized so I had to reset the sizes in the widget box. If anyone experiences a problem with size when they open after attaching the badge then the solution is easy: not to panic! In the widget box you can choose your preferred sizing. I set mine at 200 x 300 but you can play with the sizing to suit.
LikeLiked by 3 people
Thanks for adding that information, Geoff. I probably should have added that. Maybe I will.
The cover of your book looks great on your site. My copy has arrived into my Kindle. I look forward to reading it – soon. Still another one or two to go first. 🙂
LikeLiked by 1 person
Ooooooooooo thanks Nora!
LikeLiked by 1 person
Thanks for the suggestion Geoff. I have now updated the final slide with sizing information – not quite as detailed as yours, but I hope it is okay. 🙂
LikeLiked by 1 person